Okay folks!
Once again, I apologise for the really long gap between posts, this year's been hectic... T_T
In this posts and probably subsequent ones, I'll be elaborating more on the techniques used to create the maze and chinese characters. Hope you all will be satisfied by this post even after the long wait! =)
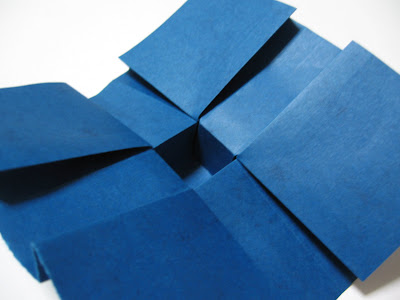
As most of you will probably have realised, there seems to be an extra feature in the Pop-Out Prosperity that hasn't appeared before; a series of holes. In previous posts, I've shown you all how to make Building Blocks that pop out of the paper, and in this post, I'll explain how to make a sinking portion in the paper, which, for want of a better name, will be called a "Negative Building Block". Hahah, I really need suggestions for the name. =)

This model was done on what could be said as a 9 x 9 grid, but with only a few creases from the grid.
The product is the cube-shaped hole in the center. Of course, the paper protrudes out from the other side, looking like this:
At least the extra paper could be neatly packed into 90-degree angles... ^_^
If you've tried making the Building Block before, you'll realise that you can't create a hole by simply reversing all the creases or flipping the paper over, because there are extra bits of paper that stick out and partially cover the hole, which does contribute much to the neatness of the model. In the Building Block, all the extra paper is stashed away into the hollow space inside the block, hiding it from the viewer. However, in the Negative Building Block, that extra paper has to go outside the hollow space as now the hollow space is the one being viewed. This leads to a drastically different crease pattern as shown below:
See the difference?
This time, I stopped being lazy and added in all the creases that ended up in the final product. However, be warned as the creases may get a little confusing; try and figure out which creases are merely two layers folded together to produce reflections!
Just like the Building Block, the dimentions for the Negative Building Block can be modified by changing the length of the sides of the small square in the centre of the CP.
Folders are encouraged to figure out how the 田 part in the Pop-Out Prosperity was created! All you need to know is how Building Blocks and Negative Building Blocks are made.
Have fun!
I'll try very hard to post as often as I can now!
Origami as Pure as Snow
shonen
In this blog inspired by Wolf, I showcase models that I design and post information of interest to the origami folder. I also have a photostream in Flickr (the link is down there). Do enjoy your visit here and don't forget to tag or leave a few comments on my work! If you have folded any of my models, please send their pictures to me, and I will be delighted to publish them in this blog. By the way, please check out the "Important Links" below the archives; they are that important :) The "Origami Singapore" page has links to other folders from Singapore. Have fun!
Wednesday, March 26, 2008
Terror Pit!
Subscribe to:
Posts (Atom)
